Unreal
Setting up Unreal Engine.
The SYNCRO-LINK MARK-ZERO makes use of the LONET-Unreal-Plugin created by Andy Jaroz of LOLED VIRTUAL
UE4.26/4.27 install
- Download the latest plugin (1.7.0 or newer) from LOLED VIRTUAL’S Github site: [https://loledvirtual.com/documentation/docs/unrealreleases/]s(https://loledvirtual.com/documentation/software-downloads/unreal-plugin-releases)
- Create a directory named ‘Plugins’ in your Unreal project folder, if it doesn’t already exist
- Unzip the file to the \Plugins directory
Unreal Projects
myproject.uproject
└───Plugins
│   └─── LONETClient1.7
│        └─── LONETClient
│             └─── LONETClient1.7
│                  │   ...
│
│   ...
Open project in Unreal Engine
- When you launch Unreal, open your project
- Unreal may warn that files are missing, you can select compile from source to generate if needed
- Unreal will let you know new plugins are available, make sure the LONET plugin is enabled
- You can go to Settings -> Plugins and search for LONET
LiveLink
- Open LiveLink
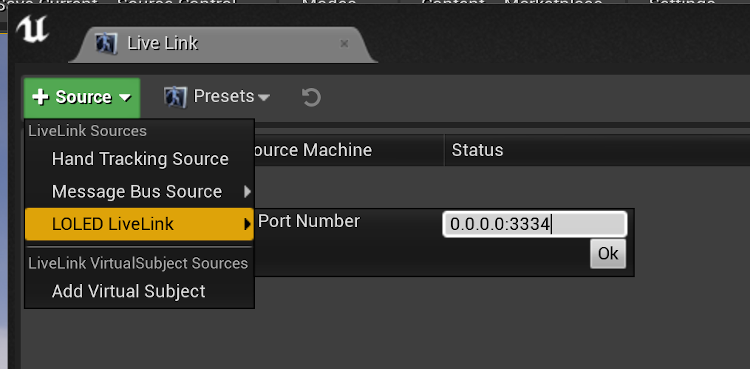
Select ‘+ Source’, then LOLED LiveLink, set the port number to the UDP port you configured in dest.txt file
- You can leave the IP address set to 0.0.0.0
- be sure to click OK button to close
If the SYNCRO-LINK is configured properly and streaming UDP packets, you will see 4 green dots as shown below
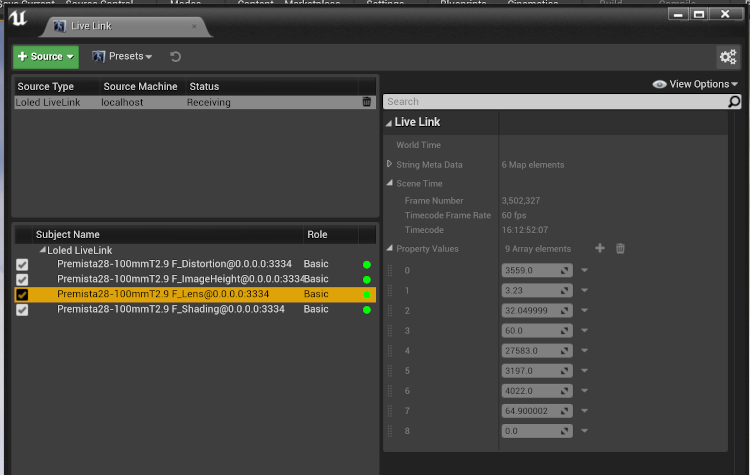
- If you click on the …_Lens@… subject, under view options, you can show live frame data
- As you rotate the lens, you should see these values changing, top field is focus distance in mm
- If data is updating and you have green dots, then everything should be good with LiveLink
Configure XDClient
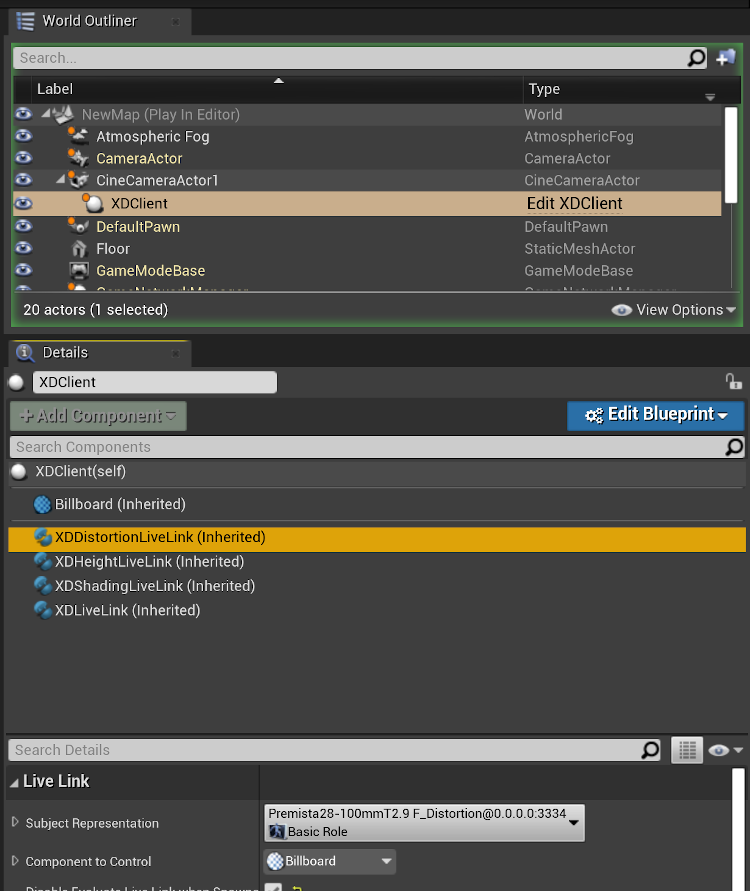
- XDClient should be present in your project, looking at the ‘World Outliner’, which shows all the actors in the current level
- Under ‘Details’ find the four components
- Under XDDistortionLiveLink, set Subject Representation to …_Distortion…
- Under XDHeightLiveLink, set Subject Representation to …_ImageHeight…
- Under XDShadingLiveLink, set Subject Representation to …_Shading…
- Under XDLensLiveLink, set Subject Representation to …_Lens…
Configure Blueprint
- Under XDClient Details, select the blue ‘Edit Blueprint’ button
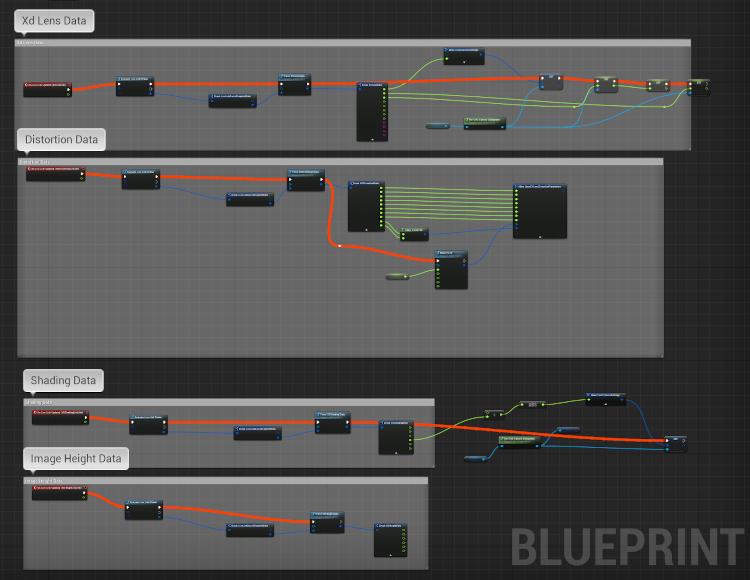
- The Blueprint should look like this
- Find the Make Fx Fy section
- Enter the ‘Sensor Res X’ as the video width being ingested into Unreal
- Note, the sensor may have higher resolution than what is sent out the HDMI/HDSDI and it’s important to provide the resolution of the video stream, which may be different than the sensor resolution.
- Enter the ‘Sensor Res Y’ as the video height being ingested into Unreal
- Enter the ‘Sensor Size X’ as the width in mm of the sensor’s active area being used to capture the resolution.
- It is important to take into account any scaling and cropping being done to determine the active area of the sensor for these values. Consult the camera manufacturer’s information.
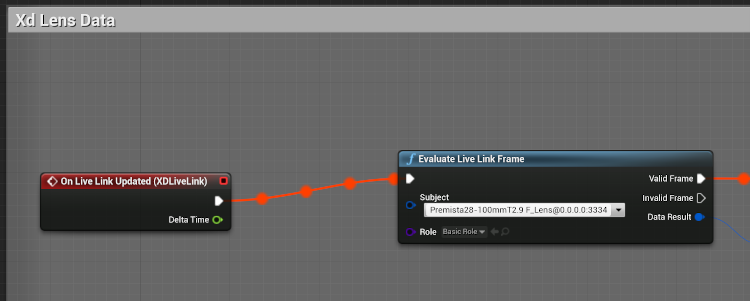
- Find the Distortion section and set the subject to …_Distortion…
- Find the Image Height section and set the subject to …_ImageHeight…
- Find the Distortion section and set the subject to …_Shading…
- Find the Distortion section and set the subject to …_Lens…
- When you hit ‘Play’, you should see orange lines with data blobs flowing in & out of the ‘Evaluate Live Link Frame’ boxes. At this point, everything is connected and data is streaming.
- At this point, close the blueprint.
Select “Camera to Drive”
- Under XDClient, find Details, Default, you will find setting for “Camera to Drive”
- Select the CineCameraActor
Confirm CineCameraActor is updating
- Now in your project click on CineCameraActor. The window showing the actual focal length of the lens. If it matches, everything is configured.
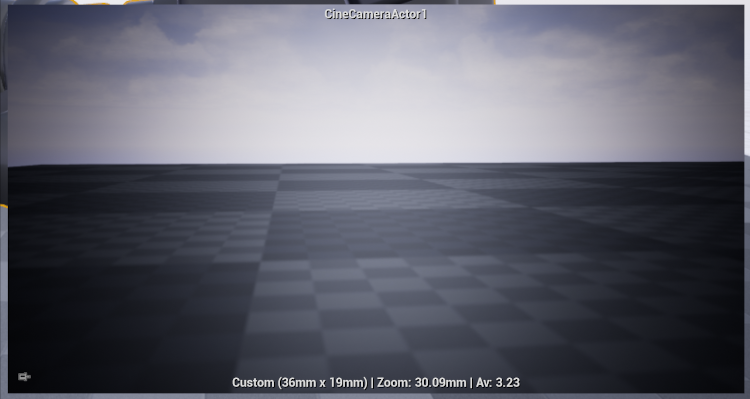
- If the film back settings don’t match, you can update them
